Preparing your system
Before you can start to setup a Jenkins job for automated testing you need to make sure that you've installed all dependencies.
1. Install OCUnit2JUnit
Jenkins is able to show JUnit test-reports in the Jenkins webinterface. To use this functionality with an Xcode project you need to convert the test-reports of the xcodebuild in a JUnit-XML format. Therefore we used a script called OCUnit2JUnit.
You can install the necessary script by entering following command in your terminal:
gem install ocunit2junit
Note: make sure you have RubyGems installed
2. Run iPhone Simulator
You need to start the iPhone Simulator on your Jenkins manually and let it run in background.
Note: Otherwise tests will fail with the following error message: iPhoneSimulator: Could not launch simulator: -10810
Open the iOS Simulator by following these steps:
- Login to your Jenkins on your build server
- Search iOS Simulator via spotlight
- Open your iOS Simulator and let it run in background forever
Note: In order to start the iPhone Simulator remotly we used the screen sharing tool Screen Sharing which is delivered with OSX.
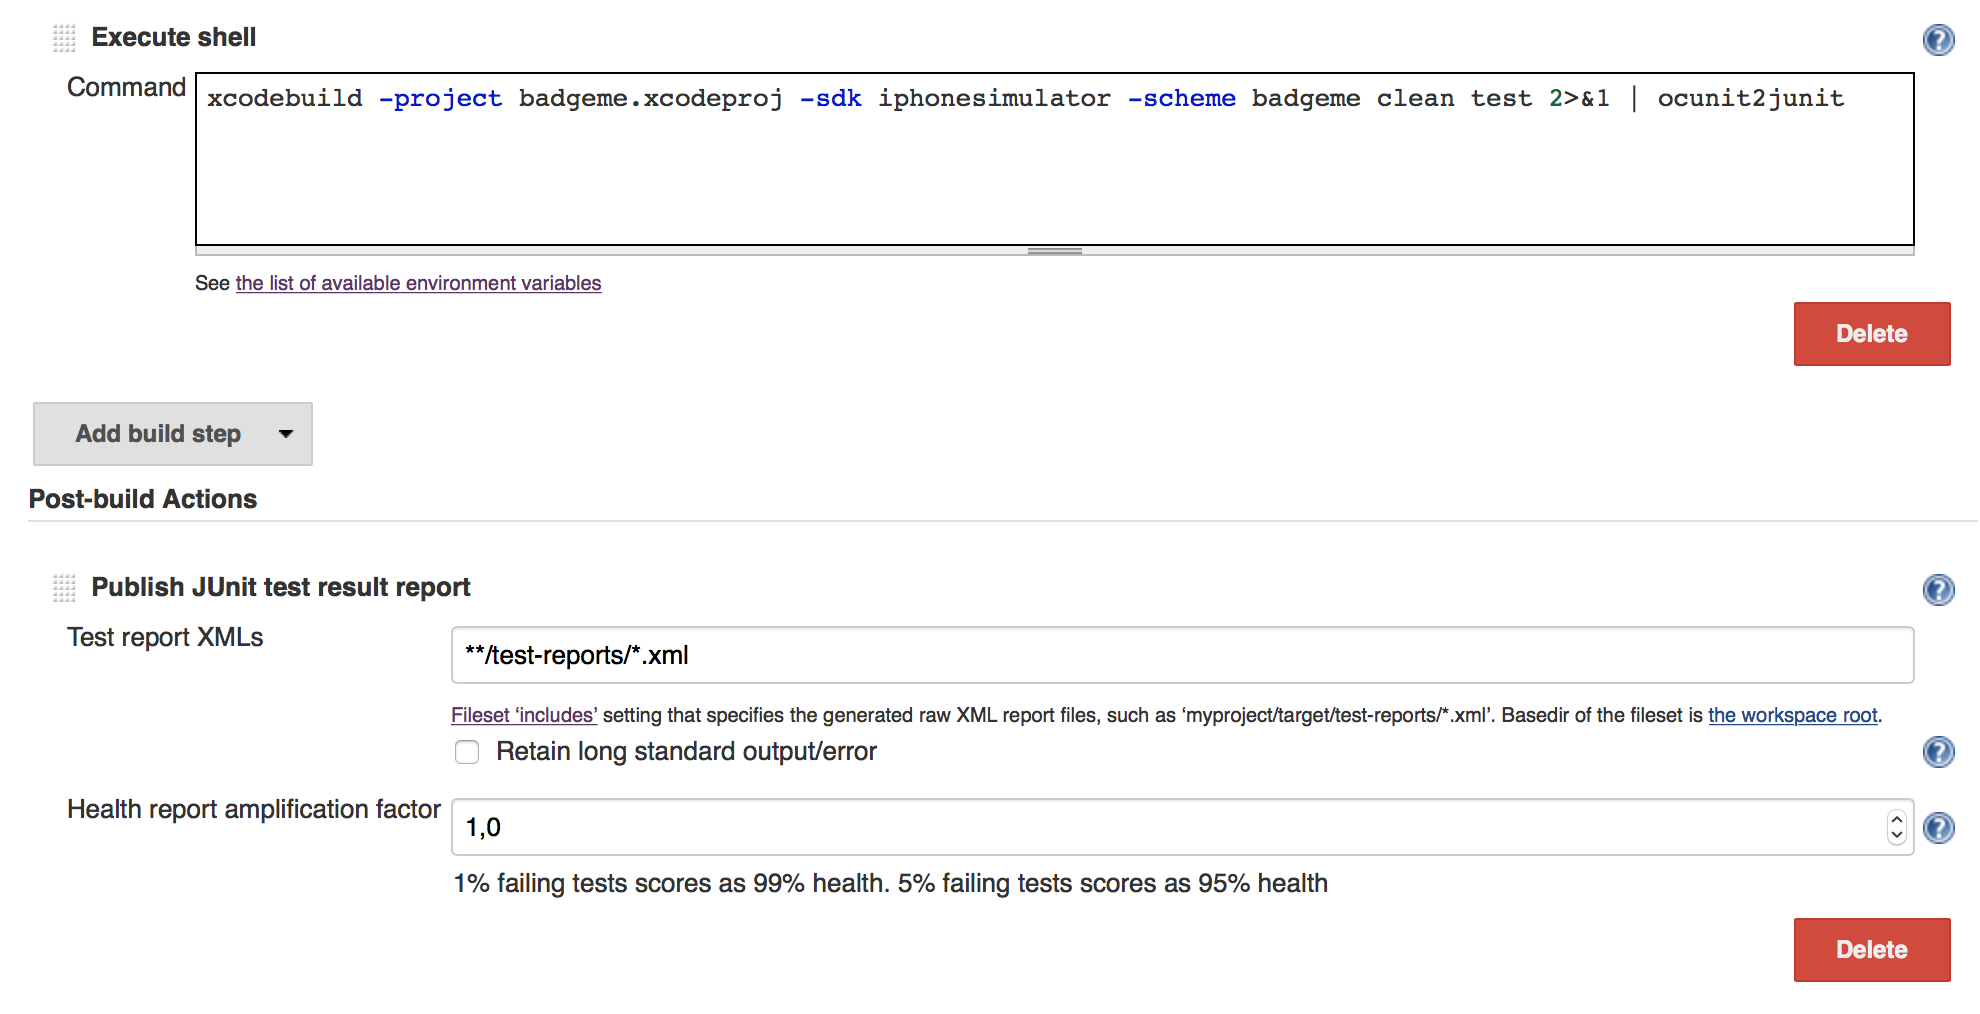
Build step - xcodebuild
To trigger automated tests after a successful build, you need to add another build step in your previously created job.
- Click on Add build step
- Select Execute shell
- Paste following shell command in the Command field (don't forget to edit the project and scheme name)
xcodebuild -project YourProjectName.xcodeproj -sdk iphonesimulator -scheme YourSchemeName clean test 2>&1 | ocunit2junit
Post build action - Publish JUnit test report result
Additionaly you need to add a post build action to make your test-report results visible.
The output of the ocunit2junit script is by default in a test-reports folder in the root directory of your build.
Add the following path to the Test reports XMLs field.
**/test-reports/*.xml
The final job
The bottom part of your Jenkins job should finally look like this:
Result
As a result you should see a graph showing your test history of the project. It shows successfull (blue), failed (red) and skipped (yellow) tests.
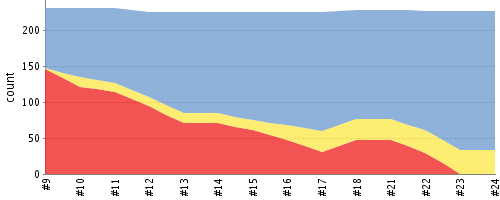 Source: https://issues.jenkins-ci.org/secure/attachment/19099/hudson_test_result_trend.png
Additionally you get a detailed test-report within each build.
