Now that we have created everything we need for code signing our application in the previous post, we're ready to set up the Xcode project.
Creating a new project
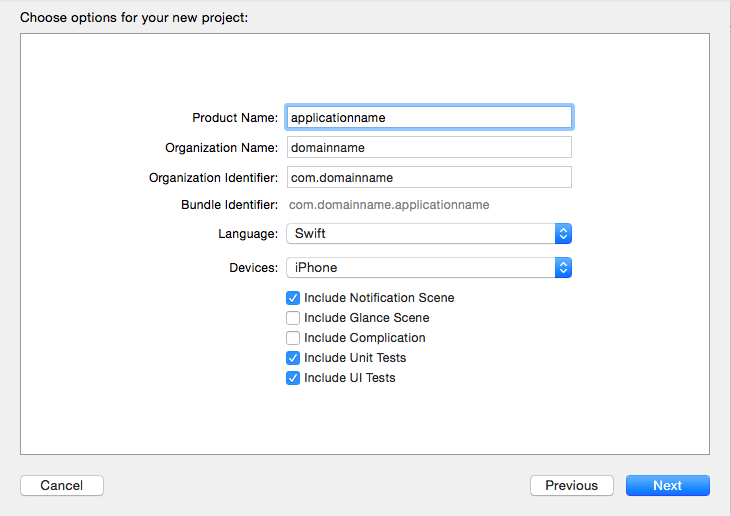
When you create a new project, Xcode will ask you for a product name, an organization name and an organization identifier. At this point it's important that these values match the related ones of the App ID(s) you've created earlier.
Note: Make sure that you pay attention to case sensitivity!
Configure the Provisioning Profiles
We also recommend that you specify which Provisioning Profiles should be used by Xcode instead of using the default value (Automatic). This gives you more control about what Xcode is really doing in the background. If the automatic setting worked for you in the past you may skip this step.
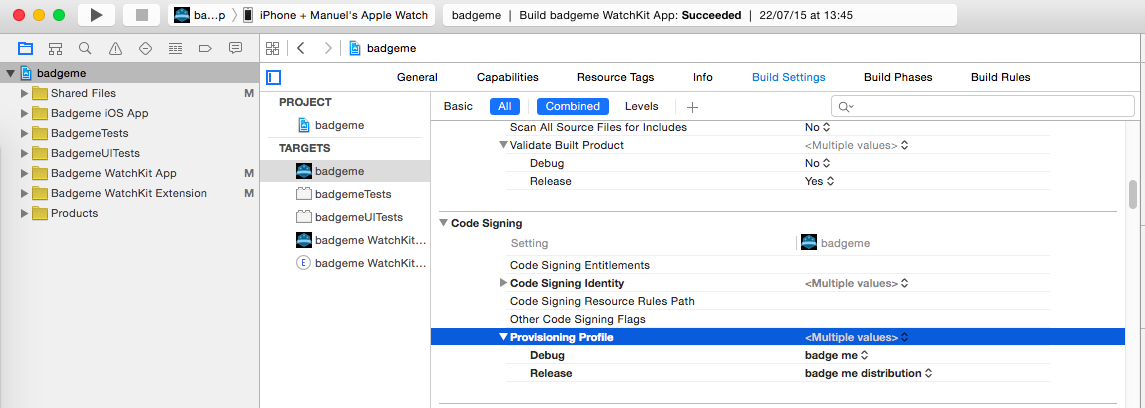
The utilization of Provisioning Profiles can be specified in the "Build Settings" tab of your target. Navigate to the "Code Signing" section and expand the "Provisioning Profile" tab. Set your development Provisioning Profile for the associated target as "Debug" and the belonging distribution profile as "Release".
Note: Like mentioned, the default Apple Watch project has 3 targets. Please proceed with the other targets accordingly.
Create shared schemes
Another thing to note for the setup of your Xcode project are schemes. While staying within Xcode to build and run your projects, there's nothing special to using schemes because the IDE handles everything for you there. If you want to use Jenkins in order to build your projects from a job, you'll have to make sure that Jenkins has access to a shared scheme because it relies on Xcode's command line tools (xcodebuild). These tools don't automatically create a scheme for running the job. This is why we'll make Xcode create a shared scheme which is just another file put under version control for your project. All you have to do to create the shared scheme is open up Xcode, select your project's schemes right next to the 'Play'-Button and click "Manage Schemes". Here you can create shared schemes by simply (un)-checking any of your existing schemes. Now, Jenkins will be able to build and run tests for you, just like Xcode could.